
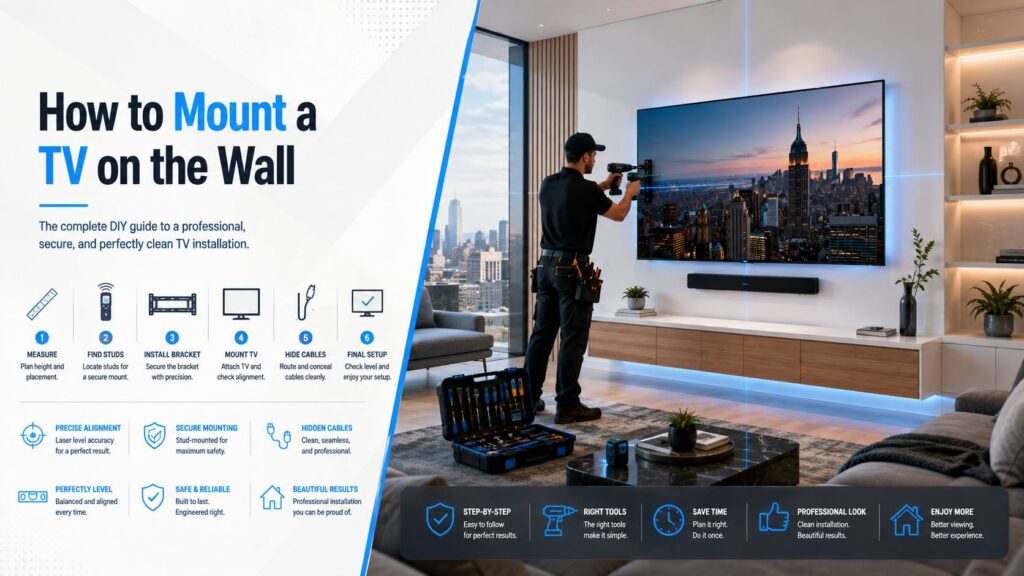
Most failed TV installs don’t fail at the drill. They fail two steps earlier, when someone guesses at the stud location, skips the weight rating, or mounts at a height that looked right standing up and feels wrong from the couch. Learning how to mount a TV on the wall properly is mostly about the order you do things in, not the tools you own. Here’s the sequence we actually follow, including the one cable shortcut that half the guides online will tell you to take and shouldn’t.
Key Takeaways
- Studs are usually 16 or 24 inches on center. Two studs is the minimum for anything over 32 inches, three for full motion mounts or screens above 65 inches.
- Pilot holes should run about 2.5 inches deep. Light wood shavings mean you’re in a stud, fine grey dust means you’re still in drywall.
- Center of screen belongs at your seated eye level, which usually lands between 39 and 45 inches from the floor depending on your seat and screen size.
- Running a standard TV power cord inside the wall violates the National Electrical Code. A UL listed in-wall power kit is the legal version of the same clean look.
- Budget 45 to 90 minutes and a second person for anything over 55 inches. The TV is awkward, not heavy, and awkward is what breaks panels.
What to Check Before You Mount a TV on the Wall
Three numbers decide whether the job goes smoothly or turns into a return trip to the hardware store.
VESA pattern. Measure the horizontal and vertical distance between the four threaded holes on the back of the TV, in millimeters. That measurement, not the screen size on the box, is what determines fit. The Video Electronics Standards Association publishes the Flat Display Mounting Interface standard that defines these patterns, and most 55 to 75 inch sets land on 400×400, with larger screens moving to 600×400 or wider.
Weight. Compare the TV’s actual shipping weight against the mount’s rating, not a rounded guess. A 65 inch panel commonly runs 45 to 60 pounds and a 75 inch runs 60 to 90.
Wall type. Wood studs behind drywall is the easy case. Plaster over lath, brick, metal studs, and hollow chimney chases each change the hardware.
Tools and Hardware Checklist
- Electronic stud finder, plus a strong magnet as a second opinion
- Non contact voltage tester
- Drill with 3/16 inch and 1/4 inch bits
- Ratchet and socket sized to the supplied lag bolts
- A 4 foot level, not the little bubble vial molded into the bracket
- Tape measure, pencil, painter’s tape
- Lag bolts, usually supplied: 5/16 by 3 inch minimum, 3/8 by 3 inch for full motion mounts or screens over 75 inches
- A second person for anything above 55 inches
A pattern we run into constantly: someone owns every tool on that list except the long level, uses the bracket’s built in bubble instead, and ends up with a screen that reads visibly crooked against the ceiling line. A 4 foot level over a 24 inch bracket catches an error the short vial never will.
How to Mount a TV on the Wall in Nine Steps
Work in this order. Each step protects the one after it.
Steps 1 to 3: Confirm the Mount, the Wall, and the Height
1. Match the mount to the TV. Measure your VESA pattern, check the weight rating, and confirm the bolt size. M6 and M8 cover most modern televisions. If you’re still deciding between bracket styles, the tradeoffs between fixed, tilting, or full motion come down to your room shape, not your budget.
2. Scan the wall, then scan the other side of it. Run the stud finder horizontally at mounting height and mark both edges of every stud, then mark the center of each. Studs sit 16 or 24 inches on center in most homes. Then walk around and look at the other face of the same wall. Outlets, switches, a bathroom, or a kitchen backsplash on the far side all tell you something might be living inside that cavity. Use the voltage tester before you commit.
3. Set the height with someone sitting down. Have a person sit where they’ll actually watch and measure floor to eye level. That number, not a universal rule, is where the center of the screen goes.
Steps 4 to 6: Mark, Drill, and Set the Wall Plate
4. Transfer your marks. Painter’s tape on the wall with stud centers drawn on it beats pencil marks you’ll lose. Hold the wall plate up, set your level across the top of it, and mark the bolt holes only when the bubble is centered.
5. Drill pilot holes about 2.5 inches deep. A 3/16 inch bit suits a 5/16 inch lag bolt in softwood framing. Watch what comes out of the hole. Light colored wood shavings mean you found the stud. Fine grey or white dust and no resistance means you’re still in drywall and your mark is off, which is the moment to stop and re measure rather than push through.
6. Drive the lag bolts with a ratchet. An impact driver strips a stud fast and gives you no feel for when the bolt has seated. Snug them until the plate stops moving against the wall, then stop. Two studs minimum, three for a full motion arm.
Steps 7 to 9: Attach, Hang, and Dress the Cables
7. Bolt the VESA brackets to the TV. Use the shortest supplied bolt that threads in fully. After enough installs you learn that cracked back housings almost always come from a bolt that was too long or a driver set to too much torque, not from a heavy TV.
8. Hang the screen and check level again. Most plates allow 1 to 2 inches of lateral slide once the TV is on. Adjust, then lock the safety screws at the bottom of the bracket, which are the ones people forget.
9. Test the full range before you plug anything in. Extend the arm, swivel it both directions, tilt it fully, and watch the cable slack. Cables that are tight at full extension will pull loose or damage a port eventually. Leave a service loop.
Total working time runs 45 to 90 minutes for a straightforward drywall install, longer once cable concealment enters the picture.
How High Should a TV Be Mounted?
The rule that gets repeated everywhere is “center of screen at eye level,” which is correct and also incomplete, because eye level depends on your sofa. A seat height of 17 inches with an average adult torso puts eyes around 40 to 42 inches off the floor. A low profile sectional drops that to 36 or 38.
Here’s the range we work within, adjusted up slightly as screens get bigger and viewing distance grows.
| Screen size | Typical seated distance | Center of screen from floor |
|---|---|---|
| 50 to 55 inch | 6.5 to 8 feet | 39 to 42 inches |
| 60 to 65 inch | 8 to 9.5 feet | 40 to 43 inches |
| 70 to 75 inch | 9 to 11 feet | 41 to 45 inches |
| 80 inch and up | 10 to 13 feet | 42 to 47 inches |
One correction worth making before you drill: glare matters as much as height. A screen mounted directly opposite a west facing window will be unwatchable for two hours every afternoon regardless of how perfectly you set the height. Either rotate the layout, or solve it at the window with light and shade control so the room works at 5pm as well as 9pm.
What to Do When There Are No Studs Where You Need Them
Framing rarely lines up with where you want the screen. Around windows, doors, and corners, spacing goes irregular fast.
Three workable options, ranked by how much load they’ll carry:
- Plywood backer board. A piece of 3/4 inch plywood, 24 to 32 inches wide, lag bolted into three or four studs, painted to match the wall. The mount then bolts to the plywood anywhere you like. This is the strongest fix and the one we reach for on off center placements.
- Heavy duty toggle anchors. Steel channel toggles rated for real load, used in all bracket holes, will hold a smaller screen on drywall alone. Plastic anchors will not, ever.
- Shift the mount and accept it. Moving the screen 4 inches to land on a stud is usually invisible in the room and always safer than engineering around the problem.
Metal studs are their own case. They’re common in condo and townhome construction and they’re hollow, so lag bolts do nothing. Toggle style fasteners rated for metal framing are the correct hardware there.
Here’s the honest caveat. A 43 inch TV going onto standard drywall over wood studs at normal height is a genuine DIY job. You do not need to pay anyone $200 for that. Where the calculation flips is screens over 55 inches, walls that aren’t plain drywall, anything above a fireplace, and any install where cables are going inside the wall.
The Cable Rule Most Guides Get Wrong
Almost every “clean install” tutorial online shows a power cord disappearing through a hole behind the TV and reappearing at an outlet below. That look is achievable. That specific method is not code compliant.
The National Electrical Code, published by the National Fire Protection Association as NFPA 70, prohibits power supply cords from being concealed inside walls, floors, or ceilings. Article 400.12 is the relevant section. A standard cord jacket isn’t rated for permanent concealment, and a fire traced back to one is exactly the kind of finding that complicates an insurance claim.
Two compliant ways to get the same result:
- A UL listed in-wall power kit. Two recessed boxes, one behind the TV and one near the floor, joined by in-wall rated cable. Roughly $60 to $120 for the kit.
- A new receptacle behind the TV, wired by a licensed electrician on the existing circuit. Cleanest option, highest cost.
Low voltage cable is a different story. HDMI, Ethernet, coax, and speaker wire are fine inside a wall as long as the jacket is printed CL2 or CL3. Check the print on the cable itself; the rating is stamped along the jacket, and unrated patch cables from a drawer don’t qualify.
If the wall is going to be open anyway, that’s the moment to pull an extra Ethernet run to the TV location rather than fighting streaming buffering later over wireless. Doing it as part of planned home network and cabling work costs far less than opening the same wall twice.
One product note worth knowing: Samsung’s Frame line uses a One Connect box, so a single slim cable runs to the screen instead of a bundle, which changes the concealment plan entirely. If you’re mounting a Samsung Frame TV, the slim fit mount and the single cable are the whole reason the flush look works.
Mounting on Brick, Plaster, or Above a Fireplace
Frederick has a wide mix of housing stock, and the wall behind the drywall changes the hardware more than the TV does. Downtown homes often have plaster over wood lath, which crumbles at the drill point and hides the stud edges from an electronic finder. Subdivisions from the 1980s onward are standard drywall on 16 inch framing. Newer townhomes turn up metal studs. Nerical, LLC works across all three around Frederick, and the first thing on any site visit is identifying which one you have.
Plaster and lath. Use a magnet to find the lath nails, which mark the studs. Drill slowly with a masonry bit through the plaster layer to avoid spidering the surface, then switch to a wood bit for the pilot hole.
Brick and block. Anchor into the brick face, not the mortar joint, using sleeve anchors or masonry screws rated for the load. Mortar is softer and it’s the first thing to fail.
Above a fireplace. Two separate problems. Height is the obvious one, since a mantel typically forces the screen well above seated eye level and a tilting bracket becomes mandatory rather than optional. Heat is the one people miss. Most televisions specify a maximum operating ambient temperature around 104 degrees Fahrenheit, and the wall directly above an active firebox can exceed that without a mantel shelf deflecting the heat outward. Measure it with an infrared thermometer during a real fire before you commit.
Chimney chases add a third wrinkle. Many are hollow framed boxes with no structural backing where you want to drill, which sends you back to the plywood backer solution.
If the mounted TV is the anchor for a larger setup with a receiver, speakers, and a subwoofer, plan the wall once rather than twice. That’s really a home theater installation conversation, and the mount position depends on speaker placement as much as on the sofa.
Common Mistakes That Turn a 60 Minute Job Into a Drywall Repair
Five patterns account for most of the calls we get to fix someone else’s install:
- Plastic drywall anchors on anything over 32 inches. They pull out under cantilever load and take a chunk of wall with them. Steel toggles or studs, nothing in between.
- Trusting one stud finder pass. Electronic finders read insulation, wiring, and old repairs as false positives. Confirm with a magnet or a thin test hole before drilling a 3/16 inch pilot.
- Mounting for symmetry with the mantel instead of for the couch. The screen looks balanced from the doorway and gives everyone a sore neck for the next three years.
- Skipping the safety screws. Nearly every mount has small set screws at the bottom of the brackets that lock the TV to the plate. They’re the difference between a bumped TV that shifts and one that lifts off.
- No service loop on the cables. Full motion arms need slack. A tight HDMI at full extension will eventually damage the port, which is a much more expensive repair than the cable.
A related one worth its own line: don’t hang your body weight on a freshly mounted bracket to “test” it. The load path on a wall mount is a downward and outward pull, not a vertical yank, and a hard test can damage the anchor you just set correctly.
Where to Start This Week
Measure three things tonight: your VESA pattern in millimeters, your TV’s actual weight, and your seated eye level from the floor. Those numbers tell you whether this is a Saturday project or a call.
If the wall is plaster, brick, metal stud, or above a fireplace, or if the plan involves getting cables inside the wall, that’s where knowing how to mount a TV on the wall stops being the constraint and the wall becomes it. Our team can look at your wall and room, confirm the hardware and height before anything gets drilled, and quote the professional TV mount installation on the spot. If the same visit also covers a soundbar, receiver, or speaker placement, we can scope the audio and video system installation at the same time rather than opening the wall twice.
Frequently Asked Questions
Can I mount a TV on the wall without hitting studs?
For screens under 32 inches, heavy duty steel toggle anchors rated for the load can work in drywall alone. Above that size, you need studs or a plywood backer board lag bolted into three or four studs, with the mount attached to the plywood. Plastic drywall anchors are not adequate for a wall mounted TV at any size.
How high should I mount my TV?
Center the screen at seated eye level for the main viewing position, which typically falls between 39 and 45 inches from the floor depending on your sofa height and screen size. Measure your own eye level while seated rather than using a fixed number. Above a fireplace, where the mantel forces a higher position, a tilting mount is required to bring the picture back down.
Can I run the TV power cord inside the wall?
No. The National Electrical Code prohibits concealing a standard power supply cord inside a wall, floor, or ceiling. Use a UL listed in-wall power extension kit or have an electrician install a receptacle behind the TV. Low voltage cables like HDMI and Ethernet are fine inside the wall provided the jacket is printed CL2 or CL3.
How long does it take to mount a TV on the wall?
A straightforward install on drywall over wood studs runs 45 to 90 minutes, including finding studs, leveling, and hanging the screen. Add 30 to 60 minutes for in-wall cable concealment, and more for brick, plaster, or an above fireplace position where the hardware and the heat both need checking.
Do I need two people to mount a TV?
For anything over 55 inches, yes. Large panels aren’t especially heavy, but they’re wide and flexible, and the risk is twisting the screen while trying to seat the brackets one handed. One person holds and guides while the other engages the plate and sets the safety screws.
Measure your VESA pattern and your seated eye level first, and the rest of the job gets a lot easier.